
7 Important Steps to Follow before Coding for an iOS app
Most of the app developers prefer to code immediately while deciding the main logic of a mobile app. This might be all right for them but this is the point leading to some unwanted issues later on. The app development team needs to give some time to plan the project properly before coding which saves a lot of time.
A sole iOS app developer handling the entire project himself might not realize the necessity of the steps mentioned below. However, numerous reliable face recognition apps have been developed with prior planning and proper teamwork minimizing the burden of the project and also enhancing the app quality. This blog post includes the 7 important steps to follow before coding for an iOS app.
1. Decide the coding style of the project
Coding style directives are the practices and methods to follow before coding in a particular language Swift and Objective-C are used for coding an iOS app among which Swift is more widely used due to its simple syntax and competence.
These directives include things such as assigning proper names to variables, whether to use ‘Structs’ or ‘Classes’ and the choice among usage of spaces or tabs. The app development team needs to set up such guidelines before coding that should be followed to ensure the most suitable coding style of the project. The foremost benefit is that the code becomes easier to read and more consistent
For more information, you can follow the GitHub swift-style-guide or NYTimes/objective-c-style-guide.
2. Choice of app architecture
It is vital to decide the app architecture before coding because a fine architecture makes the app easily testable and simpler to grasp along with minimal maintenance costs. Medium provides an awesome illustration of iOS Architecture Patterns. Usually, the conventional MVC architecture or other appropriate architectures like MVVM or VIPER are followed.
There are several online resources available to read the detailed description and the usage of these architectures as per project requirements.
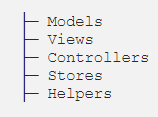
3. Organize your app folder structure
It is not viable to keep numerous source files in the same directory. The folder structure should be decided according to the app architecture used. For example, consider the following structure-
The first step is to make them as groups in the group with your app project name written in the project navigator of Xcode. Now open their File Inspector to link each group to a definite directory in your project path by clicking on the tiny gray folder icon and making a new subfolder named as a group name in the project directory.
It looks like a small task but this planning of your app folder structure is necessary to build your app more structured and straightforward to figure out.
4. Dependency Management
Usually, some third party libraries are also used in an app project. The three main ways to manage your project dependencies are-
(A) CocoaPods
CocoaPods is the dependency manager for iOS app projects coded using Swift or Objective-C. Its huge collection of about 10,000 libraries enables app developers to easily scale their projects and provides the best way to manage project dependencies.
(B) Git Submodules
Git submodules are also used to manage the project dependencies and sub repos. The foremost benefit of these submodules over Cocoapods is that they are sub repos i.e. Git graphical user interfaces perfectly identify them and provide extended support to work easily with them. Hence the project dependencies stay connected.
The only drawback of these submodules is that a project lacks the source of code you rely on. You only see a reference to the repository of a submodule and quite often you also don’t control that repository.
(C) Carthage
Carthage is a decentralized dependency manager that provides the easiest way to include frameworks in your Cocoa app. It creates framework binaries with xcodebuild but the task of integrating them needs to be done by the developer.
Carthage is very flexible but its sole limitation is that it provides support only to iOS8 and later versions.
Among the above mentioned three project dependency management ways, Cocoapods is more frequently used as it is very simple to setup and provides access to numerous third-party libraries.
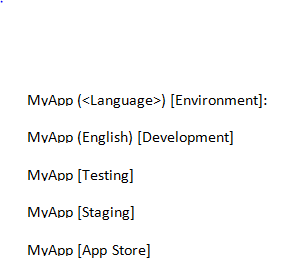
5. Setup proper schemes for the project
Xcode identifies with the help of schemas the necessary action to execute when you perform run, test, and examine procedures. These schemas map all such actions towards a goal and make configuration accordingly.
Following naming convention is recommended for schemes:
You can learn to utilize Xcode Targets to handle app development and production builds.
6. Associate suitable certificates and provisioning profiles
One of the most rigorous and key steps mandatory for testing and launching an iOS app is to setup the certificates needed for code signing so that the app developed can run on a valid device.
The two types of certificates required are-
(A) Development certificate
It is required for deploying development builds to devices. Each developer in an app development team sends a request to generate his/her certificate. Although Xcode can also perform this task, it is not a common practice to use the ‘Fix issue’ button for inspecting the actual process.
(B) Distribution certificate
There can be many distribution certificates but is fine to have one per organization. The correlated key of this sole certificate can be easily shared through an internal channel of the organization. As the name implies, this certificate is necessary to distribute your app to the App Store.
Provisioning Profiles:
A provisioning profile is perhaps the most puzzling element in the system that points to the devices for which an app is precisely signed. As mentioned earlier, you can make two types of certificates from the developer portal named development and distribution certificates. An App with provisioning profiles attribute signed with its private key is approved to run on the desired devices.
You can know more about app signing and certificates from https://help.apple.com/xcode/mac/current/#/dev3a05256b8
7. Setup an uninterrupted integration and delivery process
An association of a continuous integration and delivery process is necessary to identify errors early in the app development cycle which also minimizes the development time. The development method used by developers to assimilate code into a common repository frequently in a day is called continuous integration. Each new input is then confirmed by an automatic build that helps teams to identify bugs at an early stage and fix them.
Several online tools like Xcode Server, Travis CI, and Jenkins, etc. are available that allow developers for the continuous integration of iOS apps.
Continuous Delivery (CD):
CD is an approach in which development teams create software in small phases to ensure that the software can be consistently delivered whenever required. This approach is meant for creating, debugging, and delivering software through a quick process.
The key benefits of continuous delivery are-
- CD saves a lot of time in making an app ready for submission and. uploading screenshots.
- Releasing updates doesn’t require dependency upon a particular team member.
- The quality of app developed increases with extra recurrent and smaller releases
Fastlane is a fantastic example of a continuous delivery tool that is quite simple to setup and contains some dominant features that can fully automate an app-building and distribution procedure.
Author Bio:
Paru Saxena is the Sales head at TechIngenious, a rapidly growing company having reliable web & mobile app developers in India. His skills include digital marketing and web application development.